In the ETICS screw-in anchor Gecko U8, spiral and anchor are set independently of each other. The two-component concept offers one significant advantage: The cordless drill setting can be optimally adjusted to the substrate. In the following, we will show you how to use your cordless drill’s torque and speed for secure and quick fastening.
Speed and torque settings
Cordless drills usually have two gears for speed control, marked by the numbers 1 and 2. In the lower gear, the cordless drill rotates slower but with more power. In the second gear, the cordless drill reaches its maximum torque, however, transmitting less power.
The torque in commercially available cordless drills can also be set manually, which limits the cordless drill’s power transmission or controls the activation of the slip clutch depending on the power output. Even though power output is defined in newton metre (Nm), in cordless drills it is indicated in various settings. In our example, the power drill has 20 adjustable power settings and one drilling setting which is shown by a corresponding symbol. This setting allows for full power transmission without any limitations.
You don’t know the ETICS screw-in anchor Gecko U8 yet? Find everything about the product here
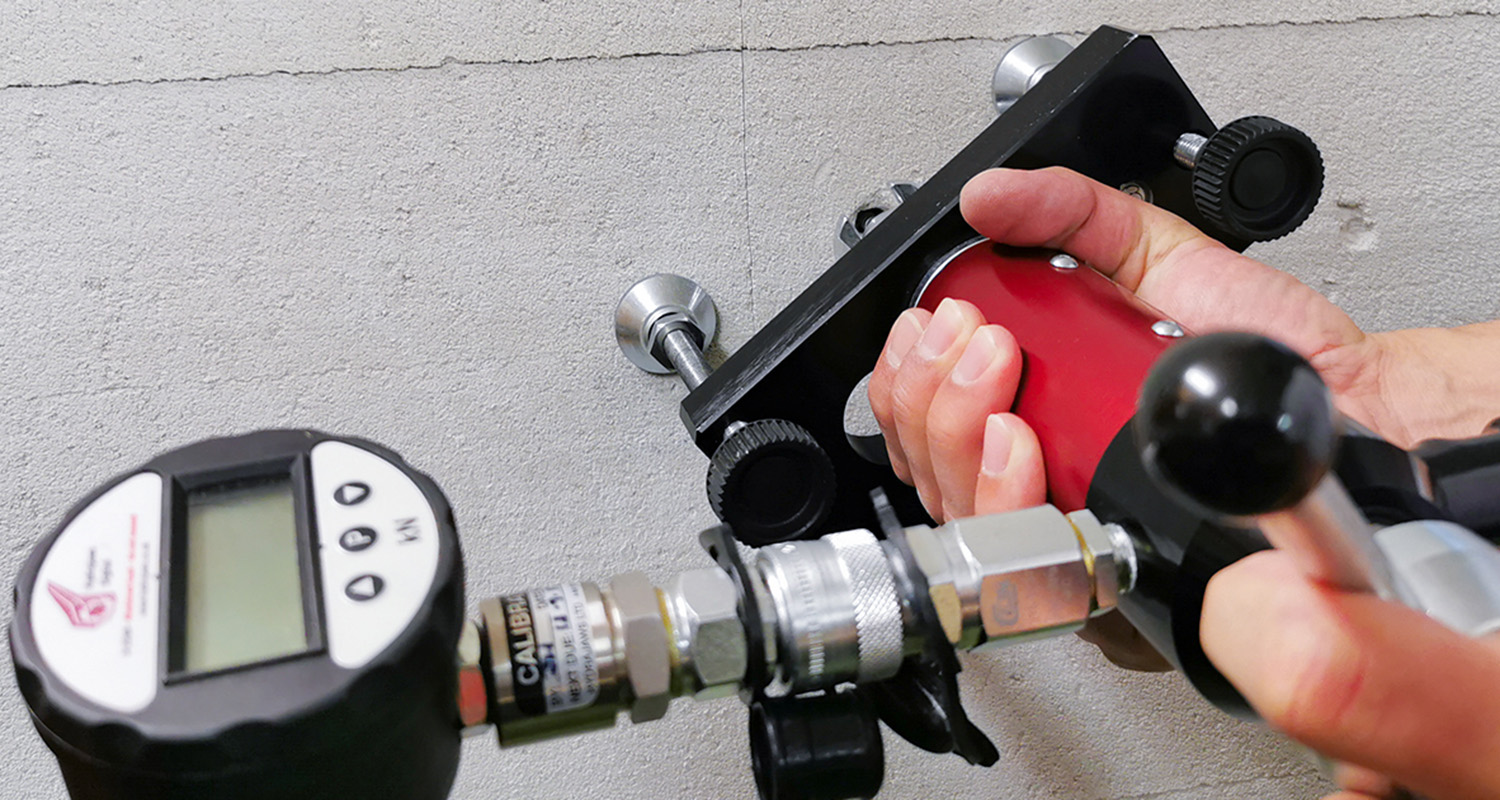
Cordless drilling setting for the Gecko U8
In the Gecko U8, we use the slower setting (first gear) to screw in the spiral while keeping the torque in the drilling setting. We work with maximum power to screw in the spiral into the insulation material. Once the spiral is securely set in the insulation material and we have drilled through it in the substrate, the screw-in anchor is fastened in the substrate. In this step, it’s important that the screw-in anchor doesn’t start to spin in the substrate, which will be classified as a wrong setting by the ETA.
For a quick and secure setting of the screw-in anchor we use the second gear in the speed setting. Here, we have to make sure to use the right torque setting. Since this depends on the condition of the substrate, we readjust the torque for every new substrate. In doing so, we slowly work towards the right torque setting when setting the first anchor. The anchor is set perfectly once the slip clutch is activated while the stop disc of the screw-in tool impinges on the insulation material.
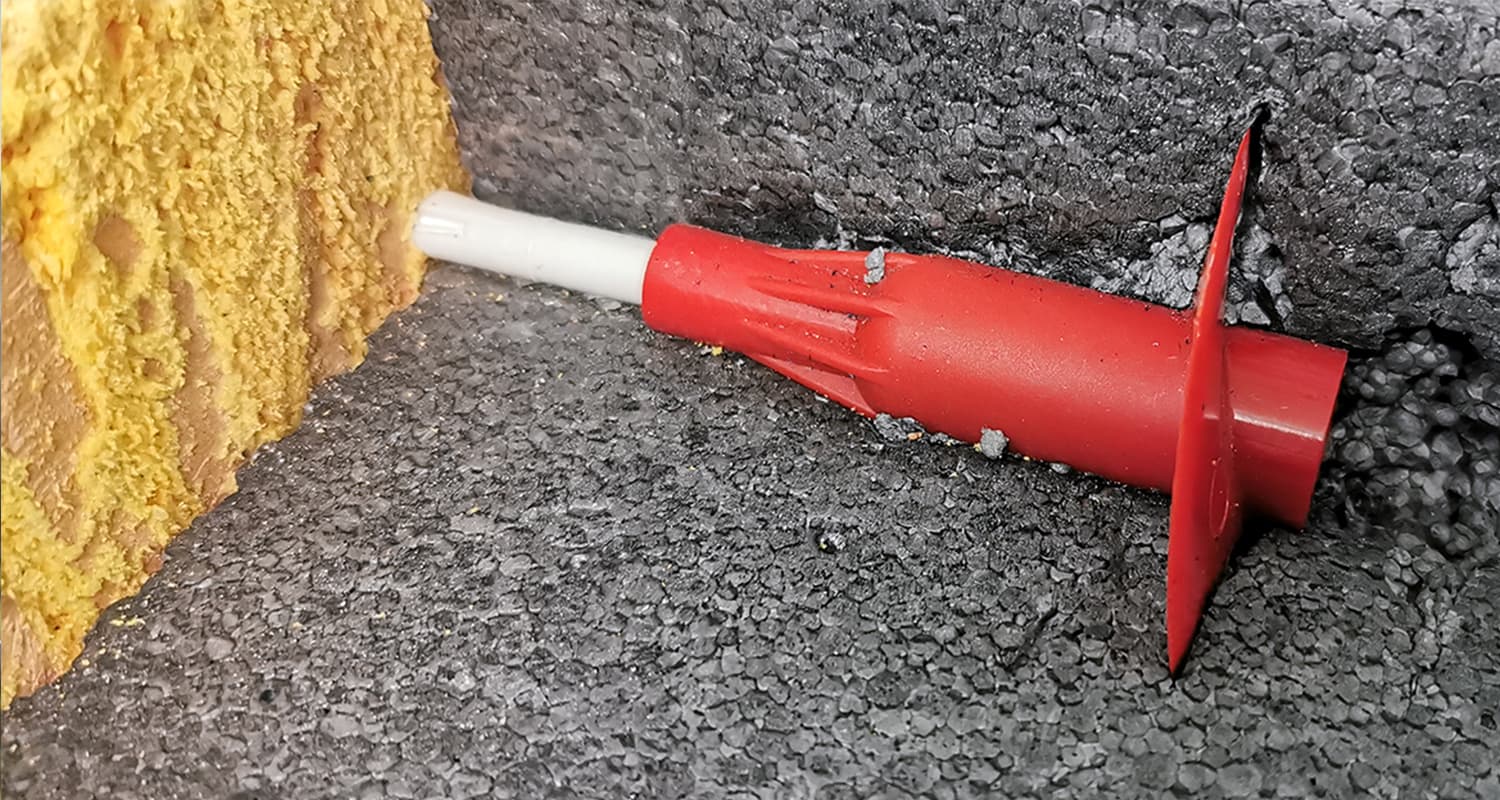
In this example we work with porous perforated brick. We start with a low setting (setting 5). As the slip clutch gets activated, even though the stop disc hasn’t yet impinged on the insulation material, we switch to the higher setting 10. The anchor continues to move deeper into the substrate, but the stop disc isn’t yet positioned correctly. This means that the anchor isn’t in its final position. That’s why, at this point, we switch to setting 15. Now the slip clutch gets activated while the disc impinges on the insulation material: That’s a perfectly set anchor. We use this setting for the entire facade.
To sum it all up: With the right torque setting the slip clutch signals that the anchor is engaged with the substrate. In addition to increased safety, working with a controlled torque promises quicker fastening.
Check out how we safe time using the right cordless drill setting: 1 minute challenge